Pages

Thursday, October 11, 2012

Burlap Pin Board

I recently started getting the Ballard Designs Catalog courtesy Kristen signing me up when she saw the style was similar to what I was trying to achieve in our home.  Although we could never afford most of their stuff, I love the netral pallet that they have going on and there are tons of good contemporary ideas.  As I was flipping through I saw this picture when I reached the office design section.


I knew I needed to have one in my new craft room...it was perfect for the ambiance I wanted.  And I would need a good idea board for when I started getting into my knit projects.  Only problem was their largest size was only 34" x 55".  Oh and it was $219.  Seriously?

One of our wedding gifts from Chris' coworker, Andy, and his wife, Lisa, was a gift card to Hobby Lobby.  Being from Oregon, I really had no idea what this store was.  When Chris first moved to Utah he actually went in thinking it would be a hobby store full of model planes and paintable military figurines.  Too bad for him it actually turned out to be a Michael's craft store on steroids.  The moment I went in I never wanted to leave.  I could set up camp there and be entertained for the rest of my life.  This place was a giant, two story, craft lover heaven.

I knew I had to focus and not get distracted from my mission.  To the cork board section I went.  They didn't have any ginormous boards like I wanted, but luckily I had Chris at home who I knew could figure out how to put them together.  I grabbed a couple 24" x 36" boards and one 16" x 36"board....64" wide would fit nicely on the wall where I planned to hang it.  The only negative I found out about Hobby Lobby was that they only allow one 40% coupon per purchase.  I was tempted to buy one, then come back in again, but I really didn't feel like being the person who gets caught and the sales people laugh at later.  I grumbled as I paid full price for two of them.

My three boards.


Next stop was JoAnn's where I also had a gift card to from the wedding courtesy my grandma's good friend, Christie, a fellow crafter and quilter extraordinaire.  Burlap just happened to be 40% that week PLUS a 20% off total purchase.  It was just a great day, let me tell you.

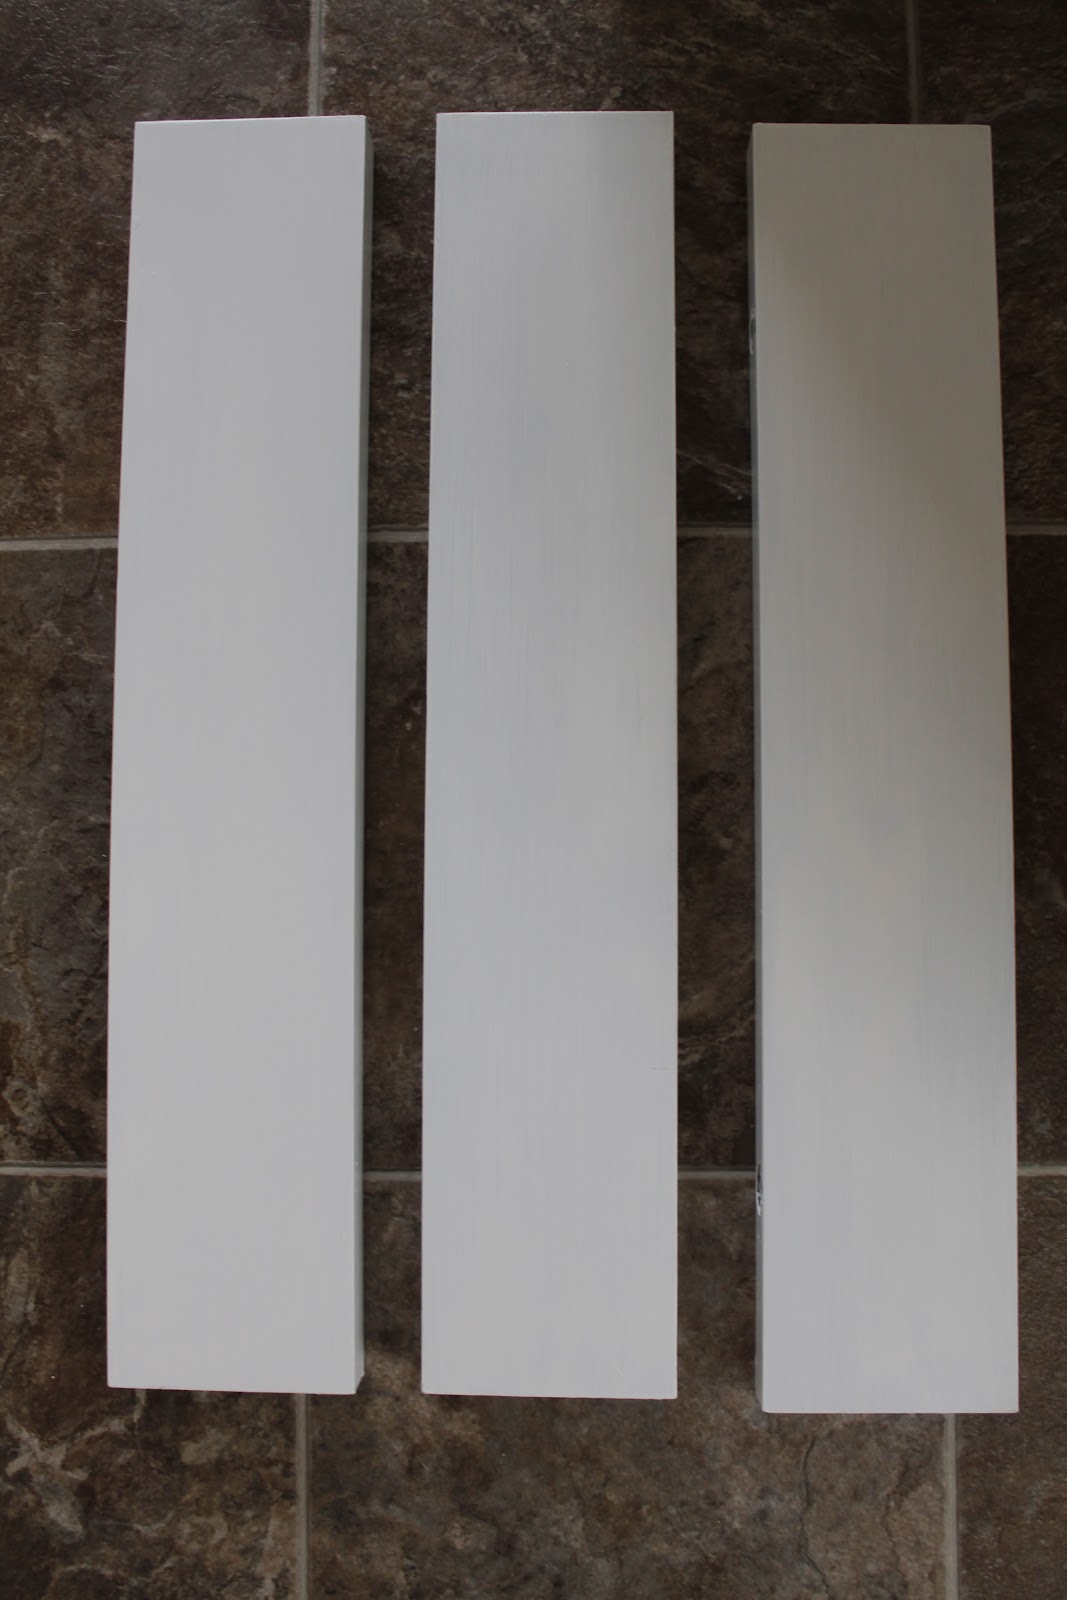
I actually left the board frame buying to Chris who went to Home Depot the next day (yes we had another gift card) and got three 6' long skinny pine boards.

First step was to build the frame.  I'm still scared of the saw, so Chris got to do all the wood cutting and nail gunning.


Then he nailed the cork boards to the frame and added one more support board that I had leftover from our canvas frame building project to keep the middle from sagging.


Meanwhile, I cut the burlap so that it would have a two inch overhang on each side to fold and tuck on the back side.


After he was done with that I got to play with the fun staple gun (side note we are not on good terms anymore after stapling my hand the other week...I got a safety talk from Chris).   After making sure every thing was aligned to the grain I started working my way around.  Finally finished, I flipped to see how she looked.


So awesome!  Final touch was to add some white thumb tacks that I found out in one of the drawers in the garage.  That place has many treasures if you search hard enough.

I decided to put a few more on than the Ballard boards had.  About halfway through when my thumbs were ready to fall off I realized that was probably a bad decision.  Too late.


A good hour later she was all finished.  With Chris' help we mounted it up on the wall with some intense hangers.  He then added one of his paper roses I made him forever ago and we stepped back to admire.


The more I add to this room the more I love it.  It's got such a great vibe going!  In case you were interested in how much this ended up costing, here is the breakdown.

Cost breakdown
Cork boards.................$41.17
Burlap........................$4.78
Pine boards..................$9.75

Total                             $55.70  (all on gift cards!!!)

If you add in the extra pine board and what I'm guessing was about $3 for thumb tacks that we already had, you can add $6.25 to that total.

Beats $219, right?

Tuesday, October 9, 2012

Deco on the Cheap

As I was moving everything from one room to another during the room switch, I realized there were quite a few Ikea picture frames that Mary had bought Chris awhile back, but never got used.  I also knew that I needed to actually put things up on the wall in my new craft room to make it a little more creatively stimulating.  I was still continuing my white theme in the craft room, though, and the frames were all black, so lucky me, more painting!  This time I was gonna take the easy way out and spray paint.  Much quicker and WAY less work.

Here is one of the smaller Ikea frames freshly unwrapped.


All my Riba style frames, courtesy Mary Bence, lined up and ready to spray.


Next step prime and spray away!


While those were drying I had to figure out what I was going to put in them that would be a cohesive look without spending any money.  I know a lot of people find old botanical prints and such, but I wasn't sure how Chris would feel about me digging through the library in his office and pulling apart books, so I opted to dig through my fabric collection.  Luckily, I just brought home a huge stack of fun fabrics from my grandma and her friend Christie that they had bought to make a quilt, but realized partially into that they weren't feeling it.  Two ladies' junk is another woman's treasure.  I picked my favorite five prints from the group and started prepping.


First thing to do was iron to get them all nice and flat.  Couldn't get out the creases perfectly, but I knew they would flatten more once in the frame.


Then I took the glass from the frames and measured each fabric swatch out to the correct size.


Once the frames were all dried and beautiful, the fun really began.  I placed each swatch in it's correct frame then started moving them around on the floor to see what arrangement would look best hanging on the wall.

Next was my least favorite of measuring each space on the wall to hammer in the nails.  It takes forever, but trust me it's worth it not to have to patch holes or be unhappy with spacing.

Then all that was left was to take a step back and admire the first set of wall decorations in my freshly painted craft room.


So cheap and easy and perfect for the space!

Sunday, September 30, 2012

Room Switch

A few days before Chris and I headed back to Portland to get hitched, I realized that I was jealous of Chris' office window.  His view looks out over our backyard with a prime view of the Wasatch Mountain Range.  My craft room window, however, gave me a prime view straight into the neighbor's house if they decided to leave their curtains open.  The builders of our neighborhood didn't quite think about the fact that two mirrored houses right next to one another meant every window on that side of the house looks straight into the other's.

The guest room is the corner room so it has two windows.  One still facing the neighbors, but the other allows me the same view as Chris' office window.  Since guests only come about once every two months or so, I figured I would most likely get to appreciate the view a little more since I go in my room every day.  I decided that when we returned to our home as newlyweds, a room switch was going to be my first project.

Although I absolutely love my yellow and stripe walls, I opted to choose a new color to deck out the new craft room.  I know I'm already using a ton of turquoise downstairs, but it makes me so happy I chose to use it again as a wall color this time.  I did go a little more blue than green this time, though, and chose Sherwin William's color Watery.

Here's what the room looked like after I cleared it of all guest room knick knacks.  Same old boring beige.


As you can see, Farrah was a very good helper throughout this whole clearing/painting process.


Since Chris wasn't home, I couldn't remove the bed since I had no idea how it was put together.  I probably could have figured it out, but decided it would take too much time and I wanted to get painting! 

Next step was priming the entire room.  Have I mentioned how much I hate closets?  Seriously.  Hate.  Them.


Ceiling and trim paint were completed next.


And then time for color! Finally!


Isn't it marvelous?  I love paint.  Not a huge fan of the painting, but truly love paint.

Now I realize I never posted a picture of my completed last craft room and that is because it never really was completed.  I got a little side tracked with wedding and other house projects, so it didn't reach its full potential.  I will show you as far as I got with it though.  Note that I took this picture after having just got home from wedding and already moved a lot of the guest bedroom furniture in...it's a bit chaotic...not my usual style.


Let me assure you that my new craft room, which I have been slowly piecing together this week, is MUCH cooler.  I already can't believe how awesome it looks and the new guest room is stellar as well.   Stay tuned to see more pictures of both!

Wednesday, September 26, 2012

Open Shelves

Looking at the large open space above my new cabinets, I really wanted to figure out a way to make it pretty, yet functional at the same time.  And, of course, it needed to be cheap since I was on a wedding budget.  Digging through my old pile of deco left over from years of living at various apartments, I found three black shelves that I had purchased from Target and used for setting bridge pictures on.  They would be perfect for setting some of my new dishes and glasses on since I was running out of cabinet space.


Unfortunately, they were black like everything else I bought in the past so it was time to bust out the old furniture paint.  I opted for white to take a break from all my turquoise.


After I begged asked Chris politely to hook them to the wall for me, I realized they were way too spaced apart and had to redo them myself.  Whomp, whomp.

Second time was the charm and the spacing looked great!


All that was left was to put some of my new dishes on them and admire.


Love my new Fiestaware and cocktail glasses!


Now I'm debating if I should hang my E A T letters in the area over the light switch rather than have them on hutch...

Thursday, September 20, 2012

I'M MARRIED!

I'm sure most of you know that my lengthy absence from posting recently was due to Chris and me flying back to Oregon to get hitched.  I actually thought I might have some time to post while I was there, but any downtime I had I needed my brain to take a break from wedding so that I would remain sane for the actual event.

It is absolutely amazing how so much time and effort can be put into making one evening the most spectacular night of your life.  I cannot thank both my parents enough for all the love and extreme amounts of help in making my dreams into reality.  A huge shout out to Chris' family for throwing us such a wonderful rehearsal dinner that was so relaxing and just what we needed before the big night.  And of course another big thanks to all my stupendous bridesmaids and friends who dedicated countless hours and small fortunes to spoil me rotten on every occasion.  Last, but not least, everyone who showed up to make my wedding such a magical night.  So fun seeing everyone!

The first big event for my trip home was the bachelorette party hosted by my close friend, Kim.  She and her husband, Chris, just recently bought a home on the Oregon coast in Lincoln City.  She actually works in Salem, so it's actually only and extra 15 minutes to drive there after work rather than back to Portland.  Lucky.  She told me they have been there almost every weekend since they bought it.   The place is absolutely spectacular.  The perfect size getaway home.  It was furnished from the previous owners, so all they had to do was repaint a few rooms and throw some more decorations on the walls.

I drove there with my friend, Rachel, Friday after she got off work.  I neglected to take any photos of the scene when we arrived, but Kim did an amazing job with bachelorette decorations.  I actually don't think I took any photos the entire week since I was too busy hamming it up with all my friends and relatives.  Nothing new though, right?

I grabbed a few photos of the weekend that I snagged from friends off Facebook.  Here is us before boarding the casino bus to take us out to dinner and our gambling adventure (btw I won a whole $15!).


And another we had the waitress snag after dinner at the Chinook's Seafood Grill.


And here I am opening my gift from Rachel, an infamous nightgown lover.  She got me three of these beauties, but I have to admit the one below is my favorite.  I think there was one day during the week I actually never took it off.  Poor Chris.


Our next big event was the rehearsal dinner hosted by Chris' parents on Thursday.  They decided to hold it at the McMenamin's Cornelius Pass Roadhouse in their Octagon Barn.  I grabbed this one from the internet so you could see how cool the venue is on the outside.


They actually had set up bistro tables outside which Mary had put beautiful flowers on.  Most people milled about outside until the food was set up because it was such a nice night.  Chris and I got SUPER lucky with an amazing weather weekend in Portland!

Inside the barn was lit up with white strung lights on all the beams and had such a cool vibe.  Dinner was yummy burgers and hot dogs served with tater tots of course.  After a few great speeches people were back to mingling, dancing and picture taking.  Here are a few snagged again from Facebook!

Chris and I with his sisters, Lynn and Cory.


Me and my seester, Emily.


My handsome hubby (yes hubby) and I.


Such a fun night!

After a day of rest crazy freakout trying to get the few last minute details done, it was finally wedding day!  Rachel and her husband, Aaron, who was our officiant, picked me up in the morning and we headed to the World Trade Center to start getting glammed up.  One of my close friends and bridesmaids, Laura Jay, was actually celebrating her 26th birthday, so we got her a cupcake and sang her Happy Birthday in the dressing room!  My beautiful boo bear!


Chris and I opted to see each other before the ceremony so that we could take more pictures and not keep the guests waiting too long during cocktail hour.  Don't worry, we still did a "capture the first look moment."  Then we decided to take some photos on one of the escalator/staircase areas of the building.  Good photo op?  Yes.  Bad place for a white dress and heels?  UM YEAH.  About halfway through us posing I was walking down and missed a step on the staircase.  I actually pictured my bruised and scraped up face as I was falling and barely caught myself before the insane face plant that would have put a serious damper on the day.  After lifting up my dress to examine the damage on my shin, we discovered that my knee was bleeding slightly.  Joys.  No one had a band aid over there of course, so Chris' groomsman, Jake, dug out a napkin in his pocket and the photographer pulled out some duck tape for one good looking patch.  It was then I also discovered I had rubbed my dress on the freshly oiled handrails of that escalator which created some amazing black patterns on my white chiffon.  Oh and did I mention the pollen from the flowers had also created small yellow stains on it as well?  Deep breaths.

I quickly reminded myself it's no use crying over spilled milk, so once pictures were over I sucked it up and decided to forget the small things and just enjoy that whole getting married to my amazing, smart, loving future husband thing.

My uncle Pete sent a few photos that actually aren't on Facebook yet, so there are a few in here that will be new so some people.

Here is Papa John and I heading down the aisle.  I can't tell if he was sad or relieved that Chris now gets the pleasure of taking care of me.  Muhahaha.


 Chris and I are so happy to finally be forever boos!


Not sure what point in the night this one was taken, but it's my favorite of the two of us so far (minus the dude in the background who I'm too lazy to Photoshop out.)


These are the wedding shoes my fabulous coworkers made Chris and I before I left for Utah.  They are so sweet.  I totally danced the night away in those babies.  I miss my iD crew!!!


And next a pic of our fabulous wedding cake.  I know it is a little out of the ordinary, but so are we, so it totally works.  And it fully went with our bridge/Portland theme. 


Here we are cutting into said cake much later in the night when the lights started twinkling.


And here are a few that Pete also sent of some of the rest of the Engdahl clan.

Gramps and grams Crane.


Brother Chris who traveled down from Seattle and brought us some of his company's (Lantern Brewing) delicious beer.


Seester Emily, Jim, Maddie and Andrew.


 Brother Bryan & Heidi with my surrogate brother, Ryley, and his wife, Amy.


And my lovely parents John & Karen.


And for the Bence clan, I couldn't find many on Facebook (post people!), so I pulled some from our "photo booth" website (more on that in a sec.)

Chris and his beautiful sisters Lynn, Kelly, and Cory.


The Taylors clan.


Woodman clan.


Grandma Joan and Chris' boss, Larry, who flew in from a conference in Helsinki!


The Jacko siblings, Susan, Anne, Mary & Mark.


And the other good lookin' set of Mr. and Mrs. Bences at the party.


Ah! What a wonderful night it was.  So fun to relive it through these few photos I already have.  Official wedding photos (shot by FS Weddings) should arrive to me in about 4 to 5 weeks and I will definitely post another slideshow when I get them.  If you want to see more of the Paparazzi Tonight photos, click here to check them out!

I'll also do another post soon to show you guys how much fun I had letter pressing all the invites and place cards.  Wahoo!

Hope you guys enjoyed my brief retelling of the wedding festivities.  I'm sure you all have some good stories of your own from the night as well!