Pages

Saturday, July 6, 2013

Laundry Room Overhaul

The first Papa John project to be completed was the laundry room facelift.  Surprise, surprise, my laundry room was running out of space due to my new hobby and I was desperately in need of more shelving.

The original room just had one row of shelving above the washer and dryer.  NOT ENOUGH.  When I moved into the house I stole Chris' "shoe rack" and used it in the back corner for more storage.  Sadly, it only took one year to quickly outgrow it too.  Not only that, but it was taking up valuable floor space and made it another one of those extremely cramped, overbearing rooms.

Now I am truly kicking myself right now because I DID NOT TAKE A BEFORE PICTURE.  Ughhhh.  It was so bad.  Believe me.  Once I cleared everything out I realized I hadn't taken the pic and there was NO WAY I was backtracking on that sucker.

Here is the "shoe rack" somewhat cleaned off.


Imagine that tucked away in the back corner of this (minus the awesome new upper shelf) and filled with crap everywhere.


So as you can see, the solution was to add an upper shelf that wrapped around the sides.  At first it seemed like it really closed the room in and I was a little nervous.  After only one day we were all used to it already and it felt bigger again.  So weird.

Here is Papa John hard at work caulking.


In case anyone was wondering what lived underneath their washing machine, here is the answer.


And just think...this house is only three years old! Ick.

My job was the all the fun finish work.  After the shelving was finished I got the pleasure of priming and painting and putting it all back together again.

I think I could paint a room in my sleep.  Seriously.


All cleaned and primed.

And with a little bit of Chris help to put the washer and dryer back in their place and light fixture replacement, this laundry room was back in business.


SOOO PURRRDY!

We had a ton of vanilla paint left from the downstairs living room and upstairs hallway, so I figured we should just save money and keep it the same.

Of course, after we finished I realized we should have put a drying bar in for me so I wouldn't have to hang Chris' jackets on every single doorknob.  Luckily, all it took was one more piece of wood to nail on and then prime and paint.  We even had one rod left from all of our other previous closet overhauls.

Here she is all stocked up.


Yes, I know I have too many detergents...I'm pretty sure it's a year and a half supply.

My mom couldn't believe that I actually filled the entire thing up.  It is A LOT of space.  I guess I'll have to take a break from buying anymore bathroom supplies for awhile...

Thursday, July 4, 2013

Happy 4th!

This year was another easy going one here in the Bence house.  Our neighbors that we enjoyed dinner with last year ended up going to the Stadium of Fire show at BYU, so we figured we'd be one our own this time.  Lucky for us, another set of neighbors came a-knocking on our door day before yesterday and invited us to join in a neighborhood gathering just across the street for dessert and fireworks.  We were so excited that we didn't have to be lame lighting them off by ourselves!

Check out these cute invites!


I was trying to come up with a dessert to bring when I stumbled across this recipe for a red, white and blue shortcake.  I had quite a few couponed Pillsbury grand biscuits in the fridge that I needed to use so I figured it would be perfect.

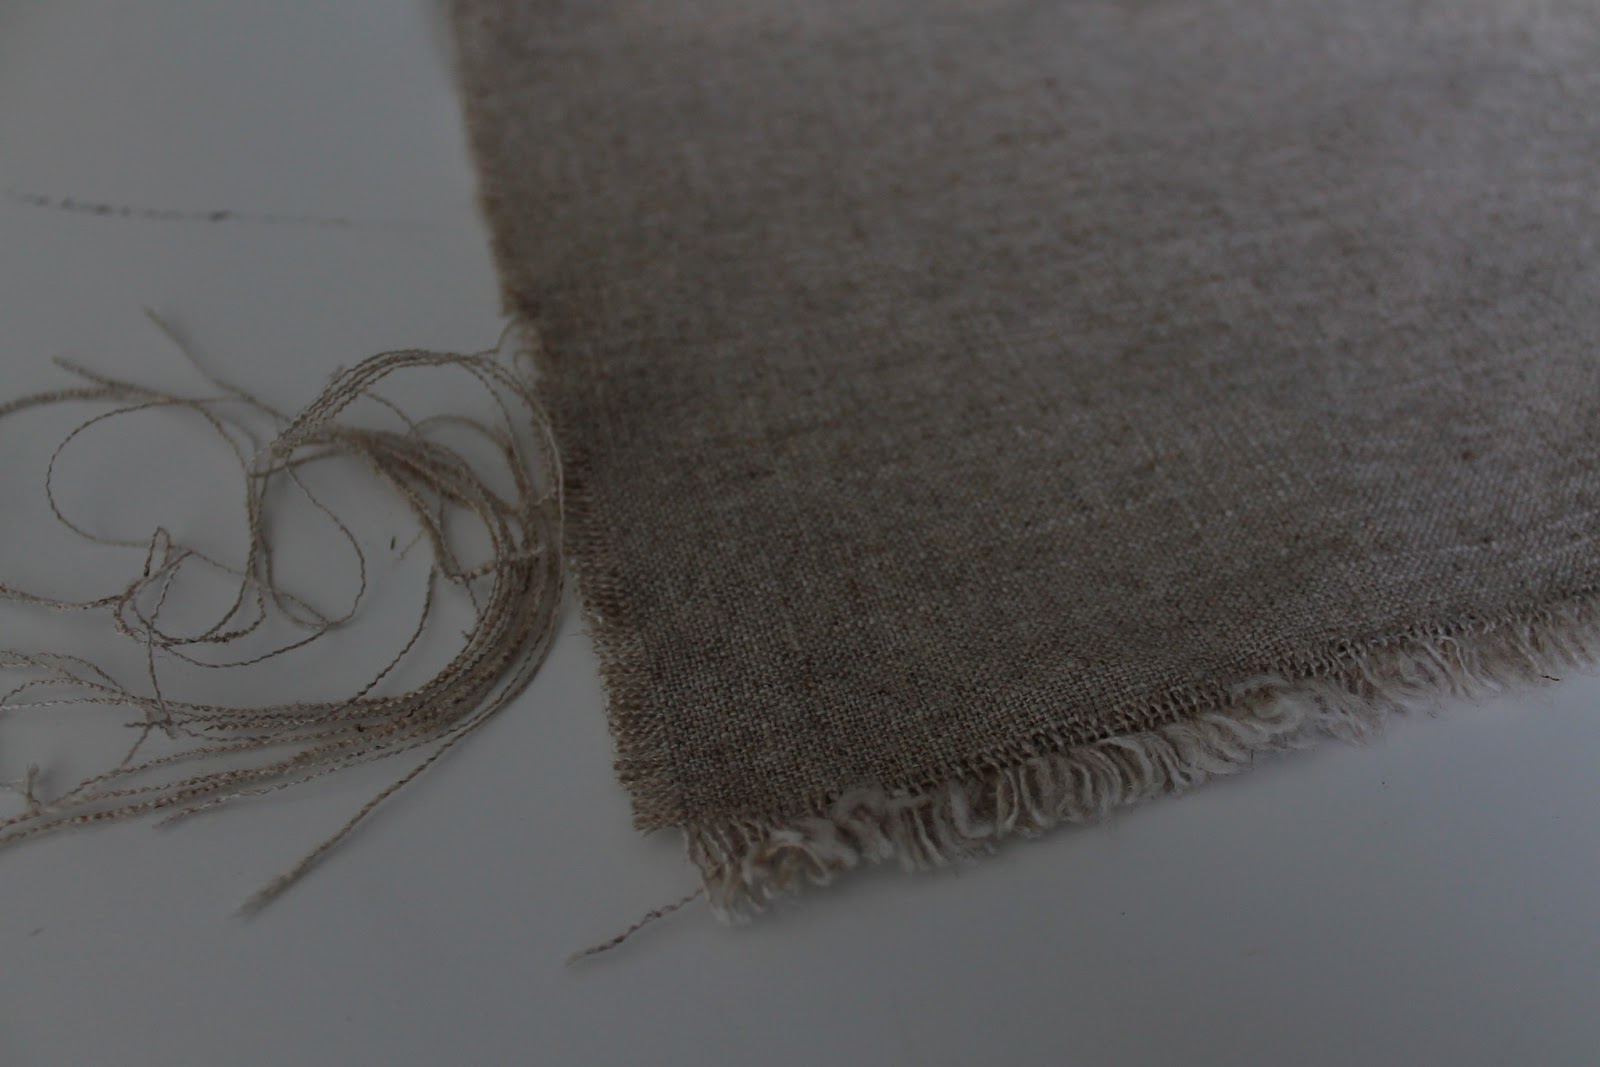
Good thing I made them early as I realized once they were freshly baked and on the cooling rack, that I didn't have a fun bread basket liner for the fourth.  No red, white or blue napkins even!  Crazy.  I ran upstairs to see what kind of fabric I had and thought that using up some of my leftover linen from curtain projects would be the way to go.  Only problem was that it wasn't very patriotic.  I channeled my inner six-year-old art project mind and opted to make a potato stamp star.  I had some red acrylic craft paint leftover from another old project.  Yahoo!

I grabbed the fattest potato I could find so I could make a decent sized star.


Then sliced it in half.


Next grabbed a piece of scrap paper, traced around the potato and drew my star.


After cutting out the star, I laid it on the potato half and used a toothpick to mark all the corners.


Then grabbed my knife and made quarter inch cuts downward from the inner marks to the outer marks.  Last take the knife and slice out the five sections.


Yay for potato stamps and very fat looking fingers!

To measure what size of cloth I needed I simply laid the linen down in the basket and eyeballed where I would make my cut.  It ended up being an 18 x 18 inch square.  The large chunk of fabric I had left had frayed ends from going through the wash after cutting and I actually really liked the look.  I decided to fray the newly cut ends instead of sewing nice folded ones.  After I frayed I threw it in the dryer for about 20 minutes to rough it up a bit more.  Not enough time for another full wash and dry.


Tools needed for stamping are paint, foam brush, stamp, a piece of scrap paper and some sort of tray...I used a paper plate.


I simply brushed a small amount on the star, just enough to cover it.  I found that if I put too much on, it really bled through the fabric.  I placed the scrap paper underneath the linen to protect the tabletop and soak up any extra paint.

Here was the first.  Didn't fully cover, but added to the look!


Here it is all finished!


So cute!  Love that the stars aren't perfectly shaped...gives them more character.  I think even if I had a star stamp, I still would have gone the potato route!

Here are the nommy biscuits all tucked away in their new linen napkin.


And the rest of the goodies that go on top!


It turned out delicious!  Butter and sugar turned those babies from a normal dinner side into a scrumptious dessert!

Sorry I didn't take any fireworks shots tonight to share.  Yes, Chris did do another big show, but the pictures never turn out!  I'm awful at night shots.  Instead I'll leave you with a pic of these two good looking peeps.

Go 'merica!


Monday, July 1, 2013

Bonus Room Finale

As you know from reading my blog, I've started couponing this year to cut back on grocery bills so we can spend the money on more fun things like all my projects coming home for weddings.  The only problem with my new found obsession is that it is getting a little out of hand.  My stock pile is getting pretty outrageous and a little unsightly.  Seriously, though, who can resist 16 boxes of pasta for $2.70 (yes, mom, I know it was your $2.70 that I never paid you back, but I mailed you those coupons!)?

Here is a picture of what my ever growing hoarding stash looks like.


Stop judging.  You wish you had all those Campbell's Go Soups.

The billy on the other side of the room houses my many puzzles.


Yes, I still need more.  Stop laughing.  Leave my cats out of this!

Since I spend a lot of my nights in that room relaxing and puzzling, I thought maybe a good way to avoid the temptation to keep eating past midnight would be to make some curtains and cover those shelves up.

Using the same methods as my earlier kitchen curtains I created these bad boys.  I figured having them split down the middle would be easier to grab things still than one giant curtain.


While they aren't the most gorgeous things, they get the job done.

And now for the final unveiling of the entire bonus room overhaul...

Here is what she looked like pre any junk removal (ok, actually there was a giant bench press behind the couch that Chris took out for me the night before, so really, it was worse).


*Shudder*

I was so cramped in there I could hardly move.  I don't even want to talk about how hard vacuuming was.  Chris put up the black felt squares on the wall back when he moved in because he was originally going to put up a giant screen and have a theater room.  When he realized how much said screen was he scrapped that idea.  So while the felt did add some nice acoustics to the room, I just felt like we could do without.  Plus I would get some more nice wood to work with once I took them apart.  Muhahaha.  I swear I asked Chris first and he gave me his permission to destroy his hard work...don't think I'm that evil!

Here is a pic after I got every thing off the walls and prepped to paint.


Took me so long to fill and sand holes!!!

And here she is all cleaned up and beautified!  


So much more space!  It feels a lot cleaner and less stressful.  Love my new bonus room!

Last project will be a little ways down the road when I make some wood art for a few of the corners!

Thursday, June 27, 2013

Project City

I am sad to say that after two long weeks the Bence House Makeover: John Engdahl Edition (Part III) has come to an end.  However, I am happy to say that the next few blog posts are going to BLOW YOUR MIND.  Have I mentioned how lucky I am to have such a wonderful, workhorse, perfectionist father?  And an amazingly supportive, weed picker, brick hauler of a mother?  Because I am. Very lucky indeed.

Before I dive into the last few weeks of projects, though, I thought I would give you a quick share today of one of the many bonus room enhancements that were done after the repaint.  I have only shared one project so far, so here is the second that I finished up right before my parents arrived.

We have a nice coffee table and two end tables that were hand me downs from Mary, but were getting a little beat up after years of use.  I had also painted the walls brown, so I figured brown tables and tan shelves were just a little too much of the same color family.  We have so much trim paint leftover that I figured white would be a nice, cheap way of sprucing them up.

Here is the original coffee table right after I sanded the top, then remembered to take the photo.


I decided this was going to be my first "distressed" project as I really like the look and it is all the rage these days.  After spending many hours looking up tips on the web for how to do it right, I finally just went for it.  The first part was sanding, priming and painting like normal.


The next part was the scary part as I didn't really know how much to sand off/where to sand and how much to beat up the wood.  I finally just took a few wacks with my hammer and felt immense satisfaction so I picked up a bag of screws and went to town with those too.  The only other tool I used was a long straight bar which I laid down flat and hit with the hammer to create indents.  For the sanding I basically roughed up every single edge along with the dips in wood on the top of the table.  I did a little bit of scratching on the flat wood parts too, but not too much.  The last touch was to take an old ratty brush, a can of brown stain and a work rag and lightly brush some color onto the white paint to give it a more weathered look.  Basically dip the brush in lightly and wipe the excess off on the rag.  Then very lightly brush it on the paint.  I would then take a different side of the rag and rub it into the wood so it left very faint color in some spots.  This was what really transformed the piece.

I opted to get some nice handles at Anthropologie when we went up Salt Lake a few weeks ago too.  Higher quality handles can really make a piece stand out.  The one on the coffee table was actually on clearance too...yay!  I really wanted to do some fun ones, but figured I should remain neutral as we will most likely be moving back to Portland within the next two years and who knows what color schemes I'll dream up then.

Here is the finale look!


And the coffee table before and after comparison.


Overall, it was pretty scary at first not knowing what they would turn out like, but I REALLY like them.  Once I've shared my last big bonus room project, I'll show you guys what they look like in the room!

Wednesday, June 12, 2013

Garden Stakage

I decided that my spoon stakes I started year before last were a little too hard to see when stuck into the brown earth.  Their rustic patina with black lettering just wasn't going to cut it.  New garden boxes, new stakes, I said.  So I went off in search of the latest craze in gardening stakes, on the internet, of course, and decided that chalkboard stakes were the thing to do.

I also thought they would make a great housewarming gift for new home owners, Kristen and Eric, since they had just started planting a few things.

After looking up prices I realized there was no way I was going to buy them when I could make about 6 dozen for the price of one.  Plus, I'd always wanted to purchase chalk paint and test her out.  Here was my chance!

First thing I needed was some wood.  After searching all over Home Depot, I found some 4 x 1.5 x .5 in beauties over near the stakes area sitting in an aisle hanging bin.  I think these were the bad eggs in some of their larger bundles that had way more than I needed and were more than I wanted to spend.  There were many that looked awful, so I picked out the best ones with no holes or splits.  I managed to find eight good ones.  The awesome news was that they were only $0.55 each!  Yahoo!


Next up was to convince Chris to cut them as I had tried before to get a nice perfect point, but totally sucked at it.  Of course Chris figured out a no brainer way of doing them by lining up a piece of tape and I probably could have taken over, but really, why would I?

Cutter man Chris is very serious.


Perfect point!


All my stakes in a row.


After he was done with 48 of these babies, I got to bust out my new chalkboard paint.  I decided to get one that I could add my own color to so I could have more fun with it and be able to change up colors in the future on different projects.  I used one of my free Valspar samples to add a pretty pink color to the chalkboard paint.


After two LONG coats and one week of required waiting per the directions they were ready to be chalk primed.  To do this you take a piece of chalk and rub it on the entire piece.  Very messy, and a little icky feeling.  You know what I'm talking about.


Then simply wipe it off with water and you have a blank canvas.


I purchased some chalk markers online in a four pack so I could use extras as gifts.  I thought the markers would look cleaner and feel a little better when writing.  Here are the two chalks I used for this project.


And the finished product!


And here they all are, brightening up my garden.


So fun!

Here is my bounty of lettuce from yesterday.  I swear it regrows in a day right now.  Loving it!


Thursday, June 6, 2013

Memorial Weekend

Taking it back a few weekends to Memorial Day, I thought I'd share some photos of our trip up to the San Juan islands in Washington for Chris' friends, Grant and Kim's wedding.  Chris and I flew up to Seattle on Friday and were greeted by his friend who drove up from Portland, Alex, at the airport.  Since we got in at noon, we decided to drop our bags at the hotel and head to downtown Seattle to grab lunch and do some site-seeing.  We chose to try Lil' Woody's for their 2012 #1 in the city rated burgers.  I did not take a photo of my delicious Pendleton burger, but I snagged this one from their website.


Mmmm.  I want one right now.  This place definitely gets two thumbs up from me.

Chris' friend, Brandon, and his girlfriend, Brittany, joined us during our meal, and afterwards, we headed down to Pike's Market.  What is a trip to Seattle without hitting that place, right?

Here's a group photo.


Touring through the market, everywhere you looked were these GORGEOUS bouquets!


So beautiful!

Next stop was not so pretty, but also a must see.  We headed down the alley to the gum wall.  Of course we added our own and grabbed a few pics.


Next up a walk past the first Starbucks.  With that line, there was no way we were getting anything...


Once the market was fully toured we decided to grab a beer at one of the second floor restaurants and do some people watching while we waited for the others in our group to arrive from New York.


We hit up a few more local restaurants for brewskies and yummy food, then ended the night at another one of Chris' friends, Andy's, new place.  It had a gorgeous view from up on the roof.  Here is a very dark pic of the Space Needle.


The next morning we were up at 5am.  Ugh.  We were really hopeful that we would make either the 8am or 9am ferry from Anacortes to Friday Harbor, but no such luck.  There was already a crazy long line when we got there, so walking on was our only option.  When we reached the dock, we hopped in a shuttle bus that drove us to other side of the island to Roche Harbor where the wedding was going to be taking place the next day.

The rest of Saturday was a pretty lazy day.  We went down to the market and got food and beverages and basically just hung out at our house that we had rented for the weekend.

Here the boys are chillin' on the porch.


The few of us that didn't go to the rehearsal dinner barbecued up some mean burgers, franks and taters.  Here are the boys before some headed to the harbor.


After the rehearsal dinner was over we headed that way to join up with them for s'mores and drinks and to take in the beautiful scenery.

Jaime and Megan roasting their mallows.


Chris, Grant (the man of the hour) and Alex.


The whole crew.


The next morning was another lazy one.  The guys had a group breakfast while the girls slept in and caught up on much needed sleep.   Around 3:45 we headed down to the harbor for the wedding ceremony.

Another guy group shot before we took our seats.


Aren't they handsome?

Stevie and I in our Sunday best.


Chris snagged me one during the ceremony.  Here is the lovely couple and their attendants with the gorgeous backdrop.


I failed to grab photos inside the reception area, but it was spectacularly decorated.  The table themes were all cities or countries that the couple had been to.  The favors were luggage tags.  Such a cute idea!  Food was delicious...appetizers got an A+ and they had one of the best wedding salads I've ever tasted.

We danced the night away until the party ended around 10pm.  Of course there was an after party at some of the other guests rented home, so we danced some more until I could barely stand I was so tired!  Success, I say!

The next morning we were up early again and headed back to the main town to grab food and catch the ferry.  After about a five hour drive we made it to P-town and headed over to see Chris' family for an early Chris birthday celebration.  A relaxing night of pizza and good company.

Tuesday I got to see my friend, Kristen's new house they moved into last month.  Yay!  So exciting.  They have already put a lot of hard work into making it their home.  She has an awesome garden area that I wish I was there to help her get going on!

We headed over to Gresham that afternoon to visit the Engdahl/Crane clan and have another Chris birthday celebration.  We somehow managed to get all of those quilt photographs squeezed in too!

It was a crazy whirlwind of a trip and we wished we could have stayed longer to see more of our friends and family.  Next trip home is scheduled for early August for another wedding and we'll definitely be making it a lengthy one!