I have to let you guys know that this post contains a spoiler for a future post. I was hoping to show you the other project first, but certain clean up work which I am too annoyed with to even talk about (CATS) is prohibiting me from showing you the finished product.
This lamp had been sitting in the corner of our bonus room for I have no idea how long. It was there before I moved in. When I started fixing it up Chris asked me where it came from, so my guess is Mary donated it to him and he stuck it in the corner of the house for the last 3 years of him living here.
And, Mary, if it was from you, I'm sure that the shade did not look like this when you gave it to him.
Who knows, right?
I did that pretty gluing job you see along the crack though to try and keep the thing from completely falling apart.
I decided that this lamp, if spruced up, would add some nice character to the (spoiler alert) freshly redone bonus room. I thought a dark brown base would look nice with the medium brown I had painted the walls.
I went and grabbed a can of spray paint and went to town.
For the shade, my first thought had been to buy a new, but the selections at good ol' Wally mart didn't fit it. Since I had no idea of it's origins and didn't want to spend too much, I just decided to cover the shade instead.
I had some leftover linen from my kitchen curtain project and thought that it would fit in well with the rest of the room. I used the shade as a guide to cut the pattern. This takes a little time to get it perfect and would recommend cutting butcher paper first as not to ruin your fabric on accident by making a bad cut.
I ironed one side under 1/2 inch so that I would have a clean edge on my seam.
Next I just used fabric glue to attach it to the old shade.
Already so much better!
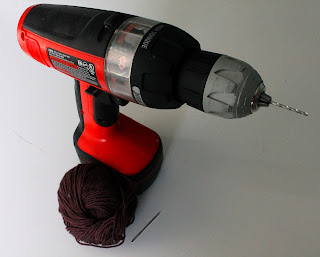
Last step was to finish off the top and bottom edges so they would look clean. I debated for a bit on what to do and finally decided to make a binding using the same linen and instead of gluing or machine sewing, I used yarn to create big stitches across it for and added flair.
Tools needed were the yarn, a tapestry needle and a drill with a 1/16 inch bit.
Here you see the finished shade and a sneak peek of the new brown bonus room wall!
Finished product!
So happy with how it turned out!


Looks fabulous. You are so creative - love your idea of big stitches on the bias trim. I have SO many old lamp shades that I've wanted to recover, but have always been leery of that final finishing on the top and bottom edges. Maybe I'll give it a try. Can't wait to see the Bonus Room!
ReplyDeleteYou know what? I wondered where that lamp was! Not that I wanted it, but I found the table size that matches it out in the garage. I think they were PB a million years ago. So glad you repurposed them! They both look awesome....especially the shade! And I love the new color of the bonus room. Good job, Laura!
ReplyDelete